Tuesday, November 7, 2017

New Blog for Photography

I realize I haven't really been active much on this blog for a couple of years. 

What used to be the time I used for crafting and creating blog posts has now been devoted to photography (and Netflix, if we're honest).


I began with mostly city scenes, nature, and landscapes, but a bit more than a year ago I began doing family portraits as well.


I thought I would let any of my past readers of Let's Drink Coffee, Darling know that I now have a new blog devoted to my portrait photography, but I have switched to wordpress.  

After having so much envy of desert photographers, I had to DIY a desert photo shoot for us when we went to Arizona.


If you would like to follow my new adventures in the craft of capturing memories, you can follow me at saxonsmithphotography.wordpress.com.  Maybe one day it will just be saxonsmithphotography.com....in case I forget to fix this post when I decide to be better than a bottom feeder. 

I saw the grand canyon for the first time this year!  Amazing, and I made sure that we would have photos with it too!

I'm not sure if I'll ever come back to Let's Drink Coffee, Darling (halfway surprised I could still log in). 

I still live in an apartment, and honestly I don't have any more space for craft projects....so maybe in the future if I do I will post them!


Hope to see many of you again!


Also, if you are still interested in the daily life aspect of my life, my Instagram is a great place to keep up with that!


Saxon

Thursday, August 25, 2016

Redo Dining Table

Wow, it has been a really long time since I've posted on the blog!  


I've missed my blog posts, and have taken photos over the past year with the intention to curate some posts that I have just never put together to pose.  Tyler's grandma (probably my most consistent reader) mentioned she missed the posts, so I've decided to put together some new posts and do some rekindling on here.  


I will probably share some DIY projects, and I've gotten more into photography which has taken over most of my free time over the past couple years, so I may share some related posts in that category.
Today I'll be going over my dining table makeover from earlier this year.


Earlier this year, I decided to redo our dining table.  Some of you may remember when I added a mismatched leaf to this same table, well I've gained a little more courage, expertise, and 4 matching chairs so I decided to redo all of them to coordinate.

I had two main goals with this project:
-to lighten up my dining room with lighter and less yellow/orange colors
-to get the table and chairs that are not the same set to coordinate


I don't have a good before of the chairs - they were just that bad.  They were basically just a dark brown color.  I may do another post focusing more on how I redid the chairs, including recovering the seats.


To really capture a coordinated look, I decided to paint the frame of the chairs white and paint the table legs white, but stain the backs of the chairs and the top of the table with driftwood stain.


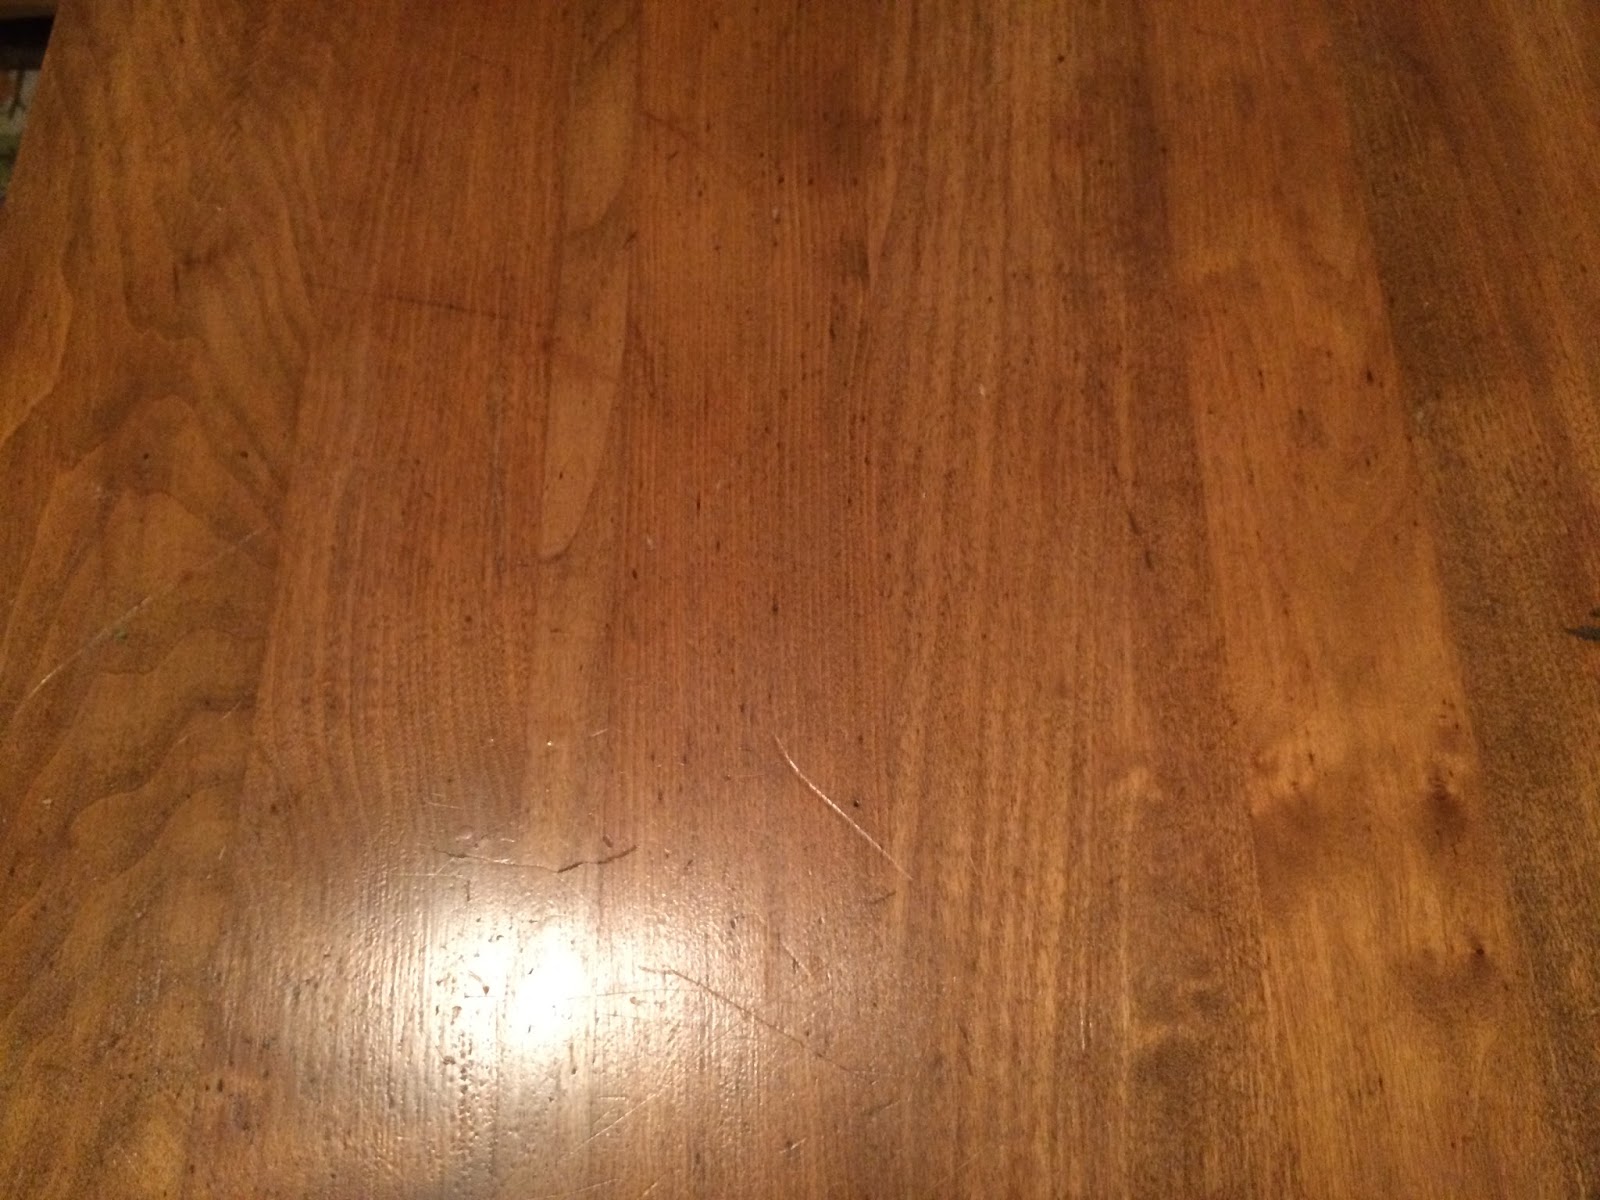
As you can see the original color was what I like to refer to as "orange glow" and also had a lot of dents and scratches.


The table also had a thick varnish.  I used chemical stripper and a paint scraper with a dropcloth to get the majority of the gummy varnish off first.


Once you see the varnish lifting you can start scraping - be sure to wear gloves and don't let it get on you!


I probably used the chemical stripper 3 times with the scraper before sanding.


 You can start to really see the original wood color.


Now that there is no more shimmer or gummy varnish left, it is time for the sander.


I live in an apartment, so in order to keep noise and dust at bay I used manual handheld sanding pad.  It would be much faster to use electric.


See the difference already?


I'm an impatient person.  I couldn't just finish sanding the other half, I really wanted to see how the stain turned out.  I was also too impatient to take pictures, but keep scrolling as I did for the next half.


Same process with chemical stripper and sanding on the other half.


New stain vs. original wood.


For the stain process, I used Rustoleum's Driftwood stain and Minwax's Early American stain.


I mostly used the driftwood, but I added dabs of early american to add some warmth - the driftwood by itself is very gray.


Just use the rag or towel to blend the stains together until it looks even.

With the paint-stain, it tends to cover up a lot of the wood grain.  I still wanted to see some of it, so I used dry paper towels after I had rubbed all the stain in to bring back a little more wood texture.


The stain looks a lot lighter when it isn't dry.


See the makeshift leaf as before.  I used the same chemical stripper and sanding process, as well as the same staining process.  I believe I added a bit more early american to get the same tone since the natural wood was a lighter color on the leaf.


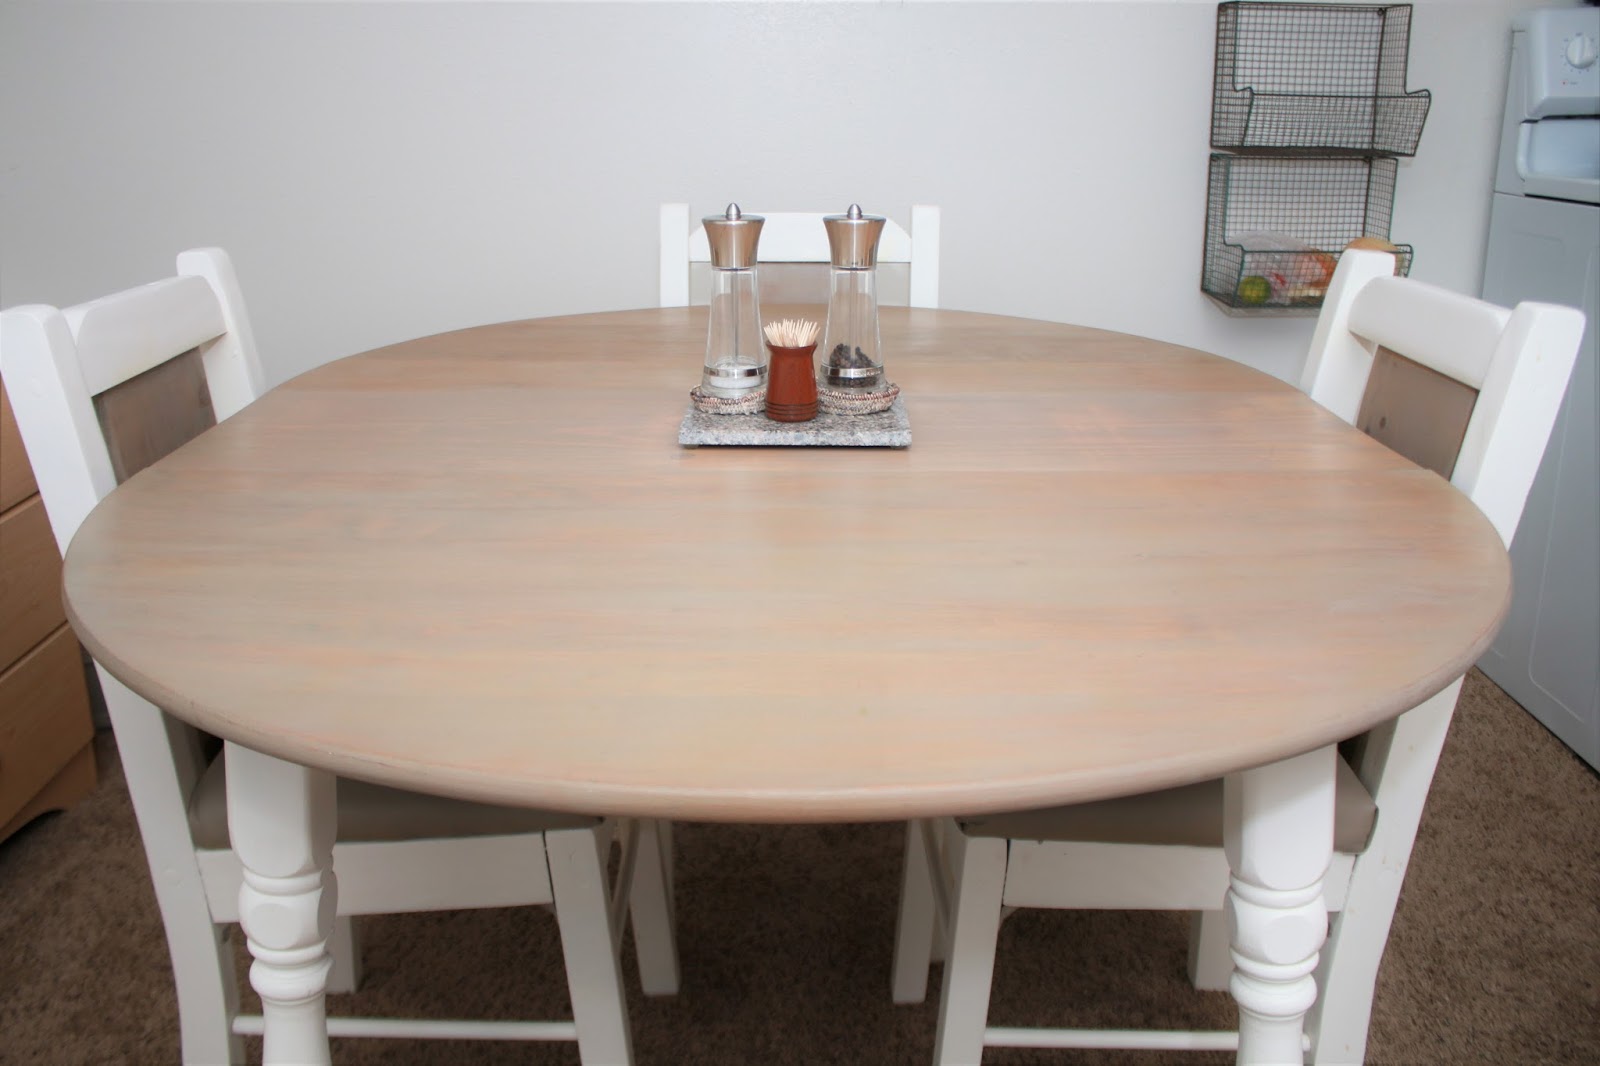
Table top all stained!


I believe I ended up going back and adding a touch more early american stain to the left side and the leaf.  You can tell they are more gray - it just needed a little more to warm it up.  It wasn't too much to just go back over in another coat.


 Looks like I didn't take any photos of the paint process.  Most tables have some screws or some sort of fastener underneath, it works best if you can flip it upside down where the top is on the ground.

Remove the legs and paint seperately on a drop cloth or plastic tablecloth (I love getting seasonal tablecloths on sale to use as cheap dropcloths).  I used Color Place antique white satin interior paint.  Once the paint cured, I have not had any issues with scratching, scuffing, and any food or coffee has wiped off easily.

Once I removed the legs and had given the top a couple days to dry, I took the top outside and used spray polyurethane to seal and prevent water damage.  I like using this because it doesn't shimmer like old style varnish, but still protects the work.

I did completely sand the chairs and table legs so the paint would have a surface to really adhere to.
I would say I did 3-4 coats of paint.  Painting things with four sides is very time consuming!


You can tell the stains set a bit differently on the chair backs and table top in the photos, but it is less noticable in person.  We've really loved our table since pulling it together and making it really look like a dining set.


It may be the second time I've redone this same table since we've been married, but I've loved it so far so I think it will stay the same for a while this time!

I've enjoyed creating this post - hopefully more to come soon!

-Saxon

Tuesday, December 1, 2015

DIY Christmas Card + Printable


Every Christmas, I try to send out some Christmas cards to family and close friends.
I don't tend to like buying cards at the store because it feels less thoughtful to me, however making twenty-something individual cards is just too time consuming.  
Last Christmas, I decided to put my creativity to the computer about 6 handmade cards into the season.  I still made all of our cards, but this time I could mass produce the results much more efficiently.

After I designed the card, I printed it on craft colored card stock in black ink.  Printing the inside message is as simple as flipping the paper over and printing on the other side - unless you have a fancy printer that does the flipping for you.


Using the open source program Scribus, I took the design from one of my hand drawn cards and put it into effect on the computer.  It was very simple text placement, but allowed me to make some small handmade changes to each card to still give it a handmade approach.
Handmade Inspiration

 Card in Scribus with Hand-Drawn Details

Interior card message.

  Using a straight edge, markers, and prismacolor pencils, you can use this generalized card to put some handmade touches to all of your cards.


Adding those embellishments are as easy as this - just make a mixture of horizontal, vertical, thick, and thin lines.


I tried to stick with Christmas or winter colors like reds, greens, blues, silver, and gold in the colors I used.  Let Christmassy patterns inspire you like candy canes, Christmas sweaters and snowflakes.


This year, maybe you're like me and like to add some handmade touches to your cards, but don't want to design them yourself?  You're in luck, because you can print this card for free at your home!


Below are two links, one for the front, the other for the inside of the card.  
Link to Merry and Bright Card FRONT
Link to Merry and Bright Card INTERIOR
I hope the printable will serve you well, and get your creative juices flowing this holiday season!  Or maybe even hand it off to the kids to make and send out!
Merry Christmas!
post signature

Saturday, November 7, 2015

Tulsa Woodward Park and Conservatory

Back in August, Tyler and I visited Tulsa while he had a work conference.  So it was more like I visited Tulsa by myself and then ate dinner with Tyler after he worked.  I made a draft for this blog post in August and forgot about it (we've been really busy these past few months), so it is going to be posted in November.  Lucky for you me hubby is working this Saturday, so I have some time to do some things for myself and with the blog!

Although I've lived in Oklahoma all my life, Tulsa was usually a bit far for my family to travel since we've always been in the central part, so I haven't been there many times.  I went to the renowned venue Cain's Ballroom for my first concert when I was 15, another concert at the BOK Center in college (do you get my drift that Tulsa has all the good venues, OKC is trying to catch up but not quite there yet).  I went to the art museums while in high school, but otherwise I have not been there besides trips that were for very specific purposes or that were under close supervision.  

This trip I discovered that Tulsa has some very amazing recreational areas and parks - Woodward Park reminded me much of some of the large parks I saw when I visited the U.K.  This particular post I'm going to focus on this beautiful conservatory.


Near the historical society there is the Lord & Burnham Conservatory with some very beautiful cacti, ferns, orchids, and other exotic plants.  It has separate rooms, all with their own climate to accommodate certain species of plants.


From the Cactus Room:


I really can't get over the webbing on these.  I think they are so beautiful. 


The gardener there said he had just watched this flower open up about 45 minutes before I came there.  The flower emits a smell to draw the flies, which in turn pollinate it.  


The Tropical Room - has palms, ferns, etc.  


I just love the white infrastructure - it was built in 1924.


I enjoyed at least a good hour walking through the conservatory observing the different plants.  The gardener was also happy to walk me around and show me some plants that were particularly special or difficult to care for.  There's just something about this old structure that is also pleasant.

Hopefully I'll have some time now to share a little more often on the blog what we've been up to and maybe some projects here and there.

post signature
Copyright 2012-2014 Saxon Smith (Let's Drink Coffee, Darling). All rights reserved.
Related Posts Plugin for WordPress, Blogger...
UA-49062203-1